Creating Guard Tour Directives
- John Flores
- Hu Sea
- Danny Jr.
Directives or duties can be added to guard tour checkpoints with the use of Destiny Rodan. These directives instruct officers to perform various tasks such as take a picture, get a signature, answer a question just to name a few. To utilize these features simply follow the steps below.
Step 1:
Do you want to give your client the access to these directives:
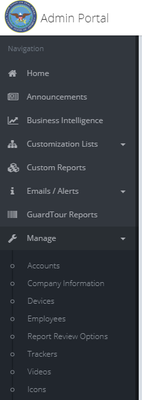
- Log into the Admin Portal:
- Click on "Manage" in the navigation bar on the left
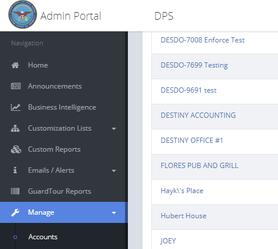
- Click on "Accounts"
- Find the account in question and click on the account name
- Scroll down to the "Report Delivery" section
- Look for "GuardTour Directives (Rodan)"
- If the drop-down says "No" click on it and select "Yes"
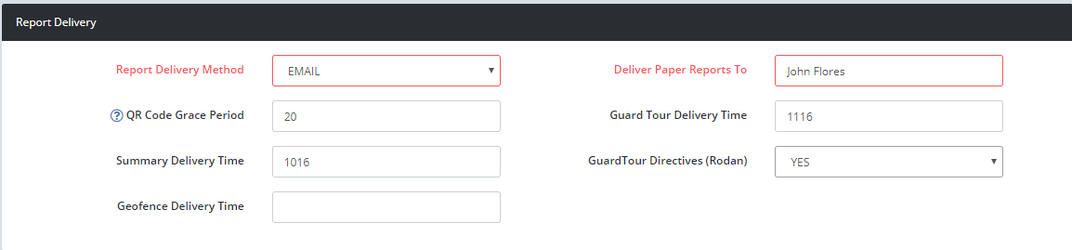
- Scroll down and click on the "Save" button
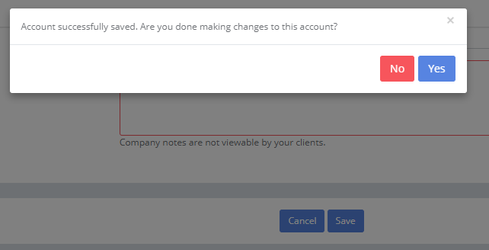
An option box will appear asking if you are done making edits to the account, click "No".
Step 2:
How to create checkpoint directives.
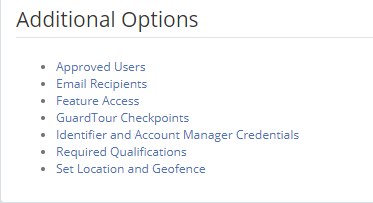
- Scroll to the very bottom of the account detail page and click on "Guardtour Checkpoints" under the "Additional Options" section.
If the checkpoint that you wish to create directives for already exists jump to step 3, if not look for the 'New Checkpoint Label" data field.
- Name the checkpoint whatever best describes the area where the checkpoint is placed
- Click "Add New Checkpoint"
- Find the checkpoint in the list of available checkpoints
- Click on the "Options" button on the right
- Click on "Edit Rodan Rules"
- Look for the "Add New Rodan Rule" section
- Priority - Priority determines which order the directives will be seen. For example a directive with priority 1 will be the first directive seen, 2 would be the second, etc.
- Input Type - Input type is the type of Directive you would like the employee to conduct. The list includes Take a photo, Scan a QR code, Request a Signature,A text box to input comments,Record a video,or answer a yes/no question.
- Directive - Type in the data field what you want the officer to do. In the case of a signature, you can say "Kindly ask the receptionist to sign your device".
- When done click on "Add New Rule"
Step 3:
Now when the officer logs onto Destiny Mobile and clicks on the "Guardtour" icon and scans the checkpoint. Again in the case of the signature, A white signature box will appear with the instruction to "Kindly ask the receptionist to sign your device". Once the receptionist has signed the officer device he/she would click on the "Done" button. If there are no other directives the device would go back to the Destiny Mobile main page.
The Rodan entries can be viewed by the client from the Client Portal and soon will be part of the emailed guardtour report. You, the Admin, can view directives in the Admin Portal - Guardtour Reports feature.